Eye Testing for Kidney Function Rate
-
Prepare the eye images before inserting them into the KFR. (refer
"Capturing eye images" guidelines.) Both the
left and right eyes should be identified correctly. The following image
shows a typical left eye (Fig. 1a) and right eye (Fig. 1b)
The following iris images are for reference only. Actual images that you
are using may vary.

(a)
(b)
Figure 1
-
The main user interface can be seen below. (Fig. 2)
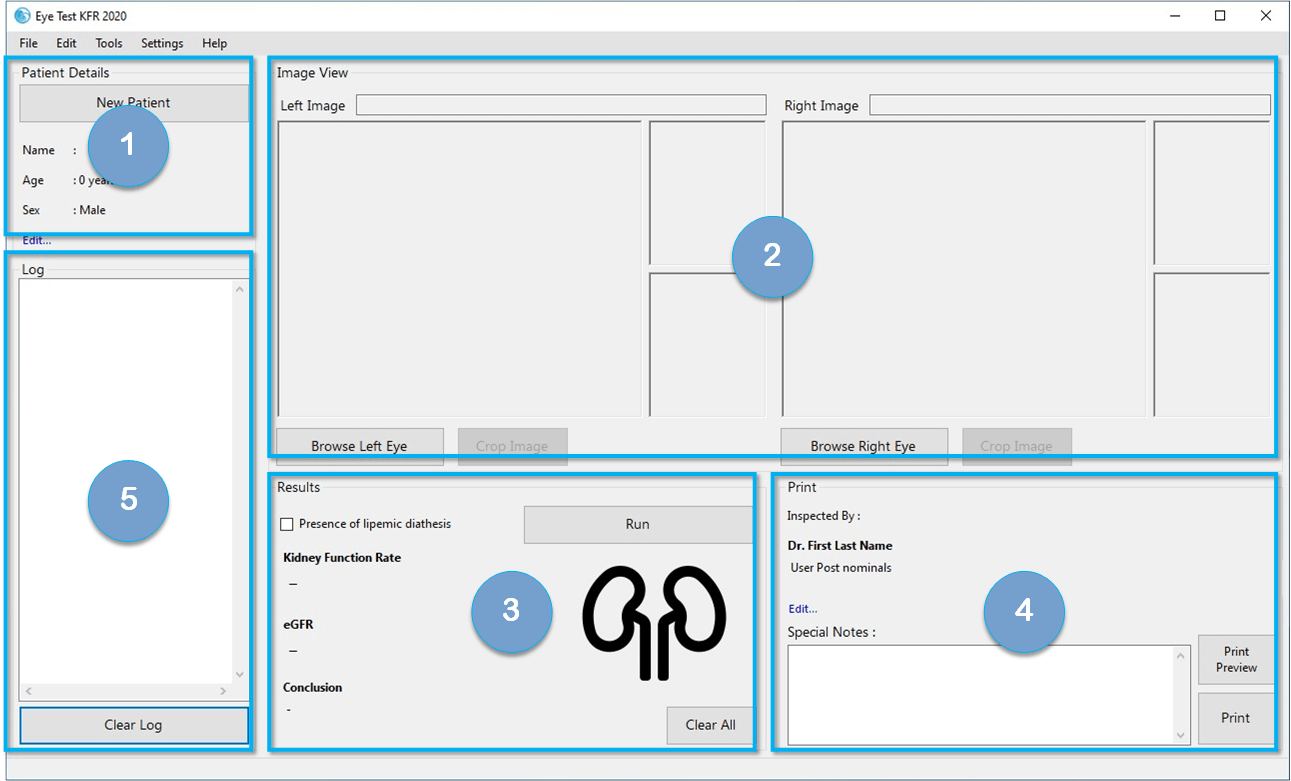 Figure 2
1
Patient Details - Add/ Edit Patient details
2
Image View - Add/ process patient eye images for testing
3
Results - Display results based on the patient's eyes.
4
Print - Print the test as reports
5
Log - View results for all the current conducted tests.
-
Press "New Patient" button to start a new test. A pop-up will appear to
enter the patient's details. (Fig. 3)
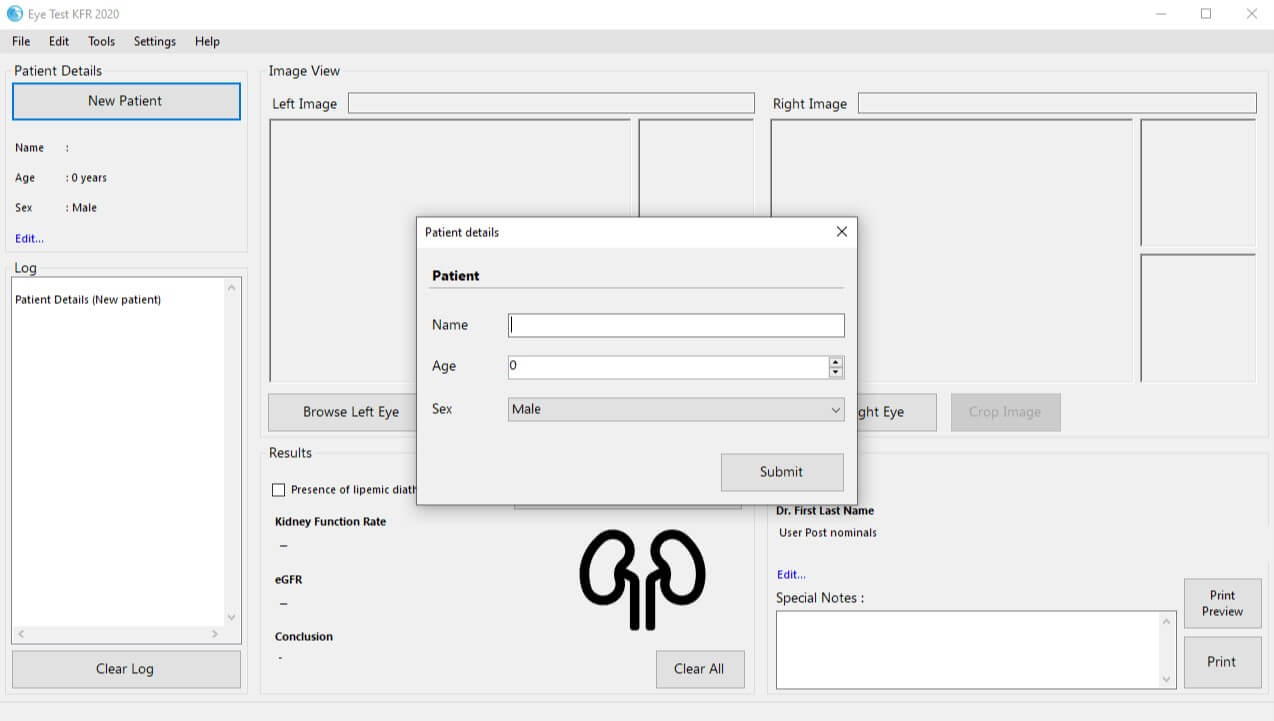 Figure 3
-
Enter the patient details in the "Patient Details" user-interface, (Fig.
4) and press Submit.
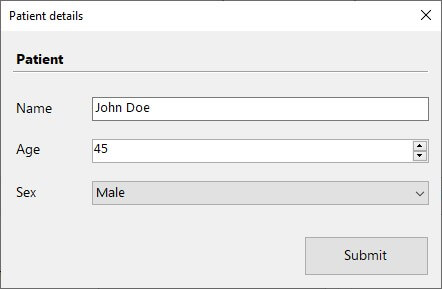 Figure 4
-
Browse for Left eye from your PC using the
"Browse Left Eye" button. A pop-up file explorer window will be
opened. . Choose the desired Left eye image and press the open button on
the lower right side. (Fig. 5)
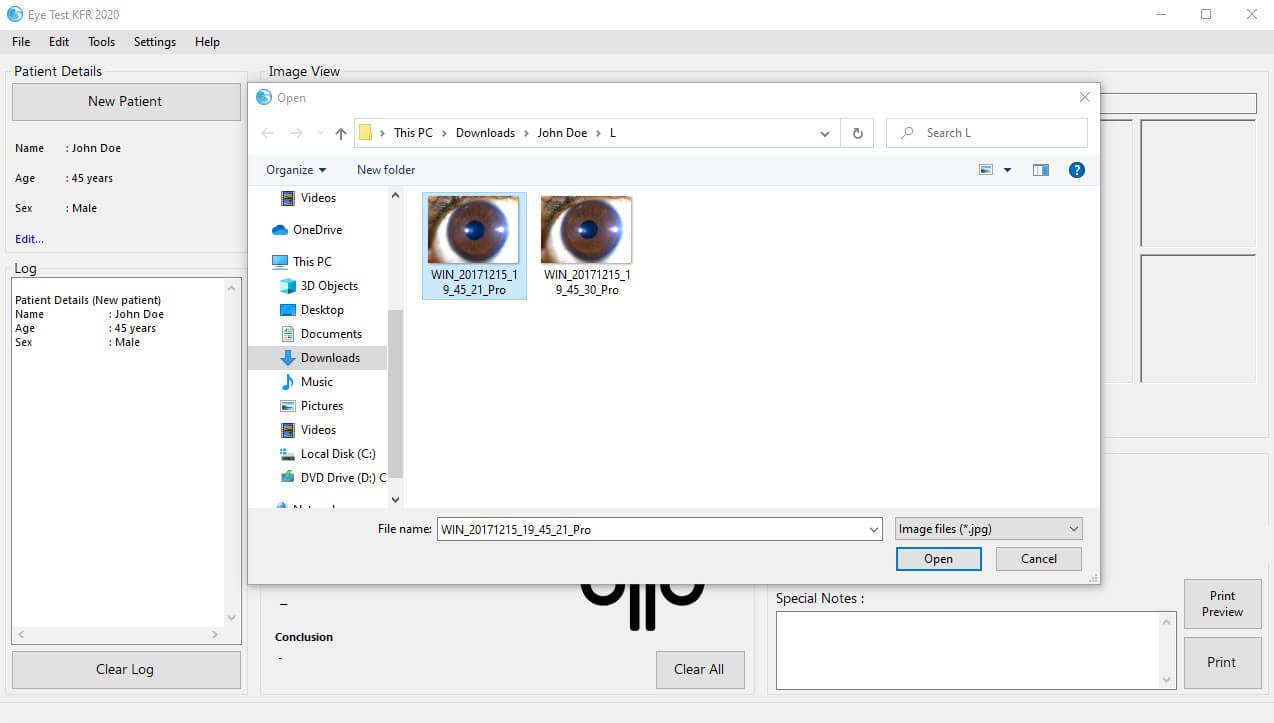 Figure 5
-
Follow the step 5 for the Right eye selection also using
"Browse Right Eye" button and add it to the main user interface.
The user interface will be shown as below after adding both the images.
(Fig. 6)
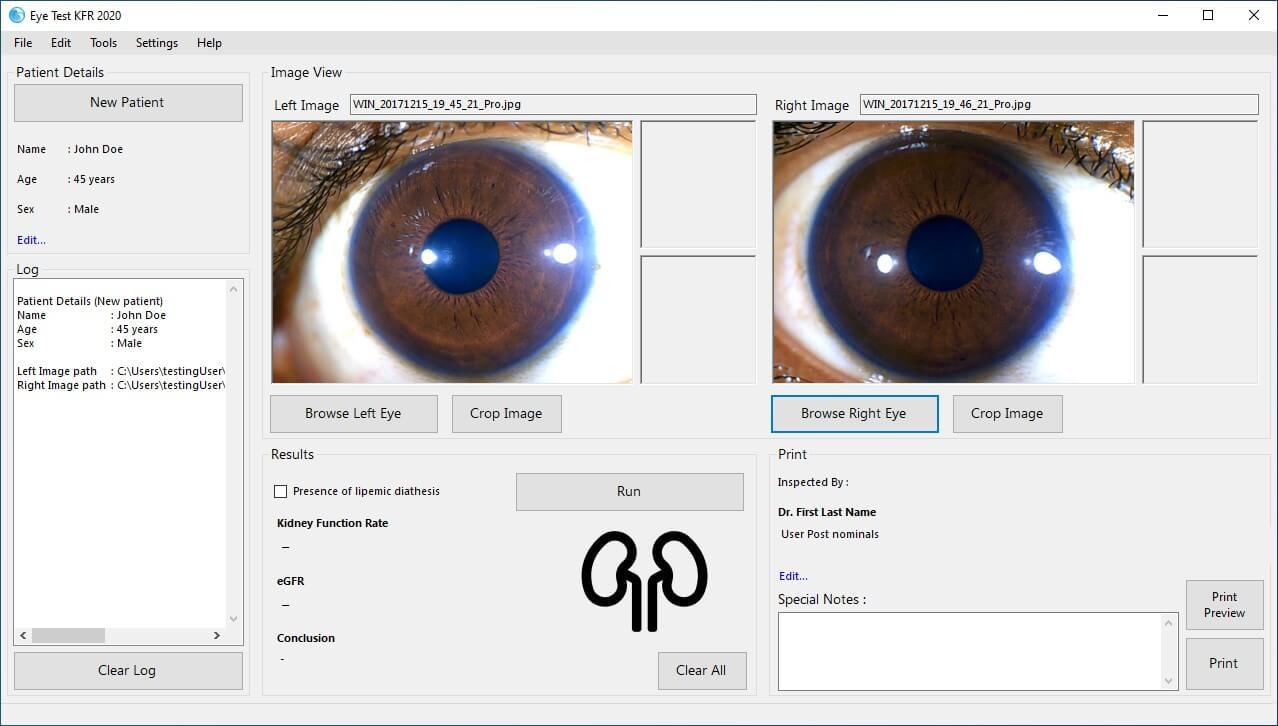 Figure 6
-
Use "Crop Image" buttons to automatically detect the Iris and crop
the required region of interest. (Fig. 7)
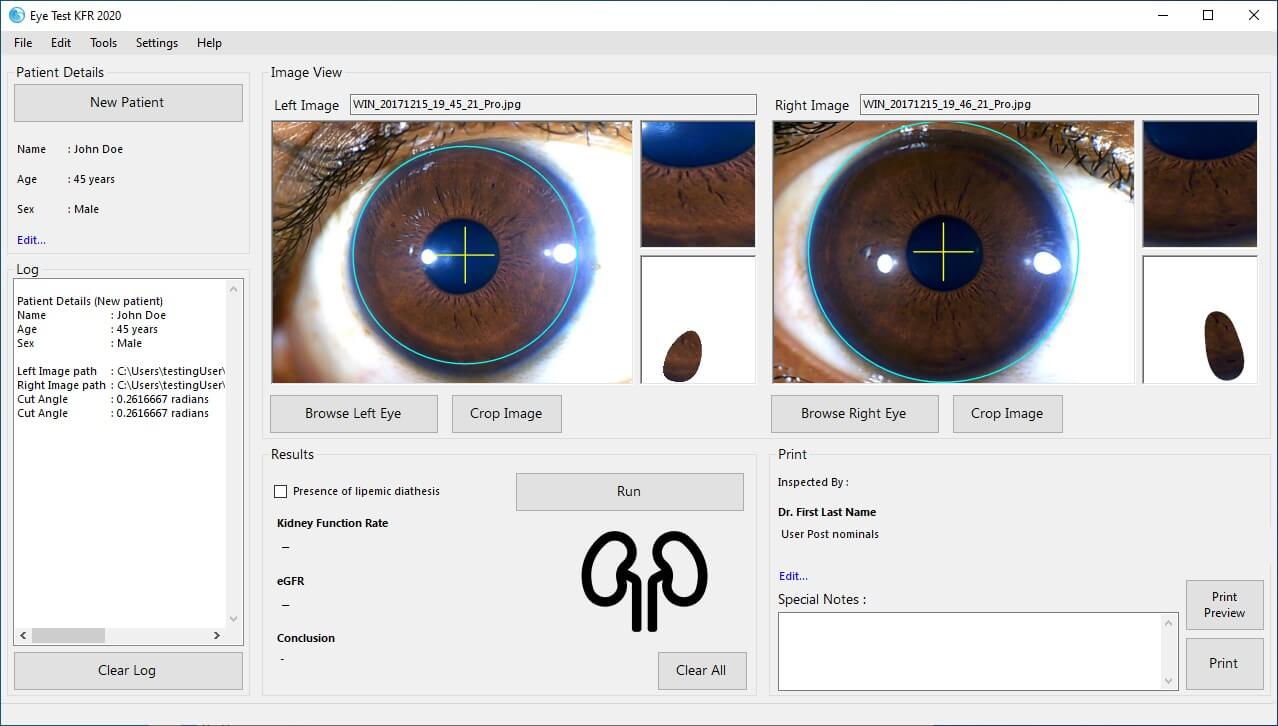 Figure 7
Special note 1: Examine whether the detected circle
indicates the perimeter of the iris. (marked in purple color). The center
crosshair (marked in yellow color) should be in the center of the pupil.
Note that these markings should be as in the above figure. (Fig. 7)
If in any case these markings are not in appropriate places (Fig. 8),
please switch to
"Manual Crop Mode"
from Tools. Please refer
"Manual Crop Method" guidelines for more
information.
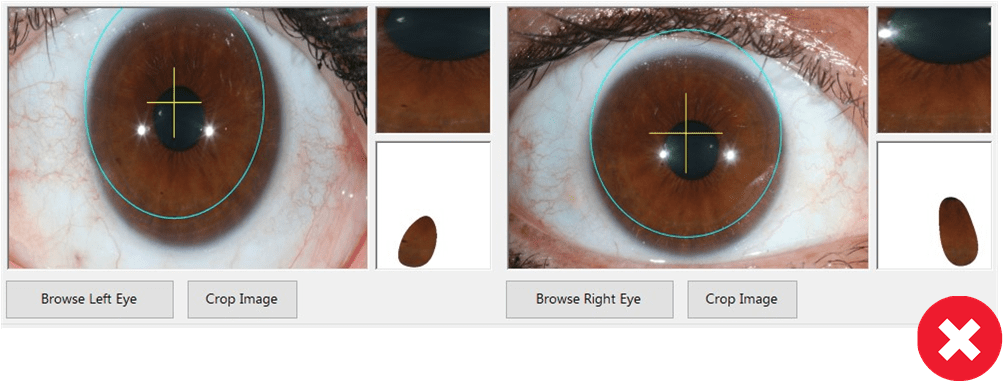 Figure 8
Special note 2: Examine the cropped boxes for each image
(Cropped image and Region of interest). These should not have sclera or
skin. Cropped images ideally should be like below. (Fig. 9 - a good crop)
If somehow it contains sclera or skin (Fig. 9 - bad crop), switch to
"Manual Crop Mode"
from Tools. Please refer
"Manual Crop Method" guidelines for more
information.
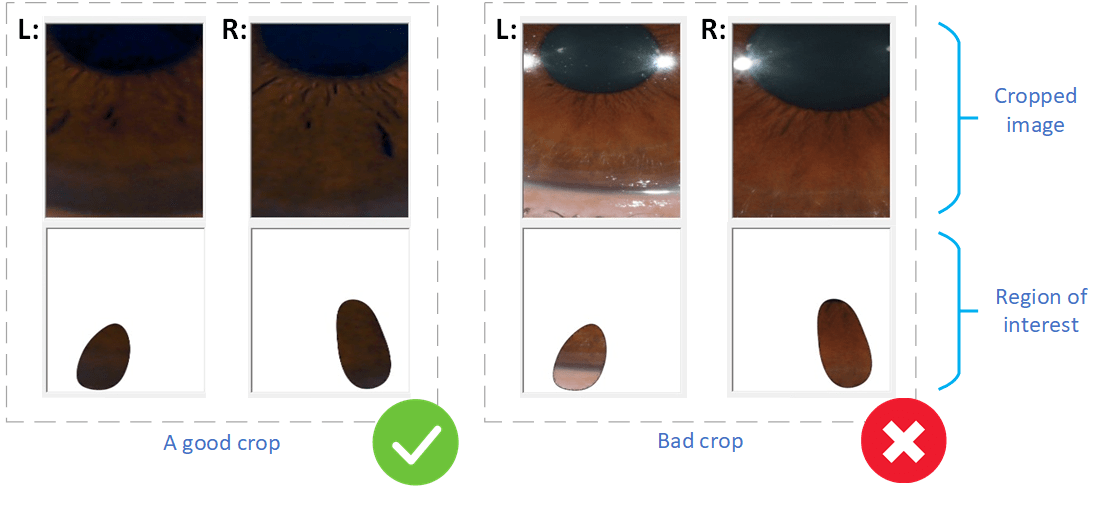 Figure 9
If the image view does NOT fall into the special notes section above, you
can proceed.
-
Press "Run" button in order to get the results for the selected
subjects’ eyes. The Results can be seen in the "Results" section, and a
complete log along with other useful information can be found in the "Log"
section. (Fig. 10)
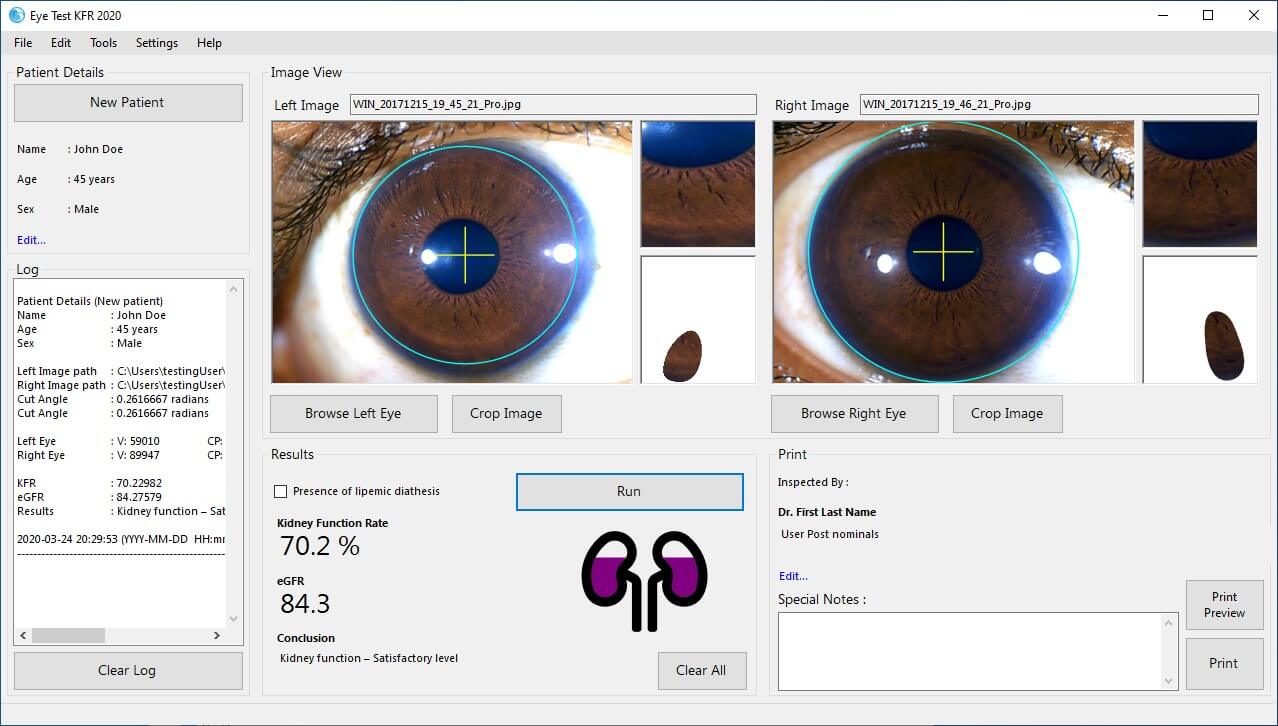 Figure 10
-
Refer "Results and Log Values Guideline" for
a detailed explanation of the log results.