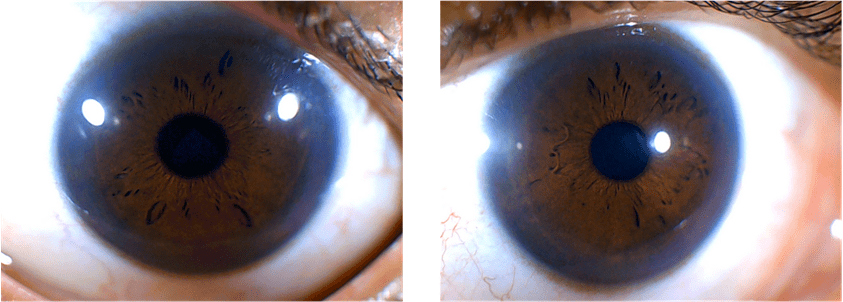
Prepare the eye images before inserting them into the KFR. (refer
capturing eye images guidelines) Both the left and right eyes should be
identified correctly. The following image shows a typical left eye (Fig.
1a) and right eye (Fig. 1b)
The following iris images are for reference only. Actual images that you
are using may vary.
(a)
(b)
Figure 1
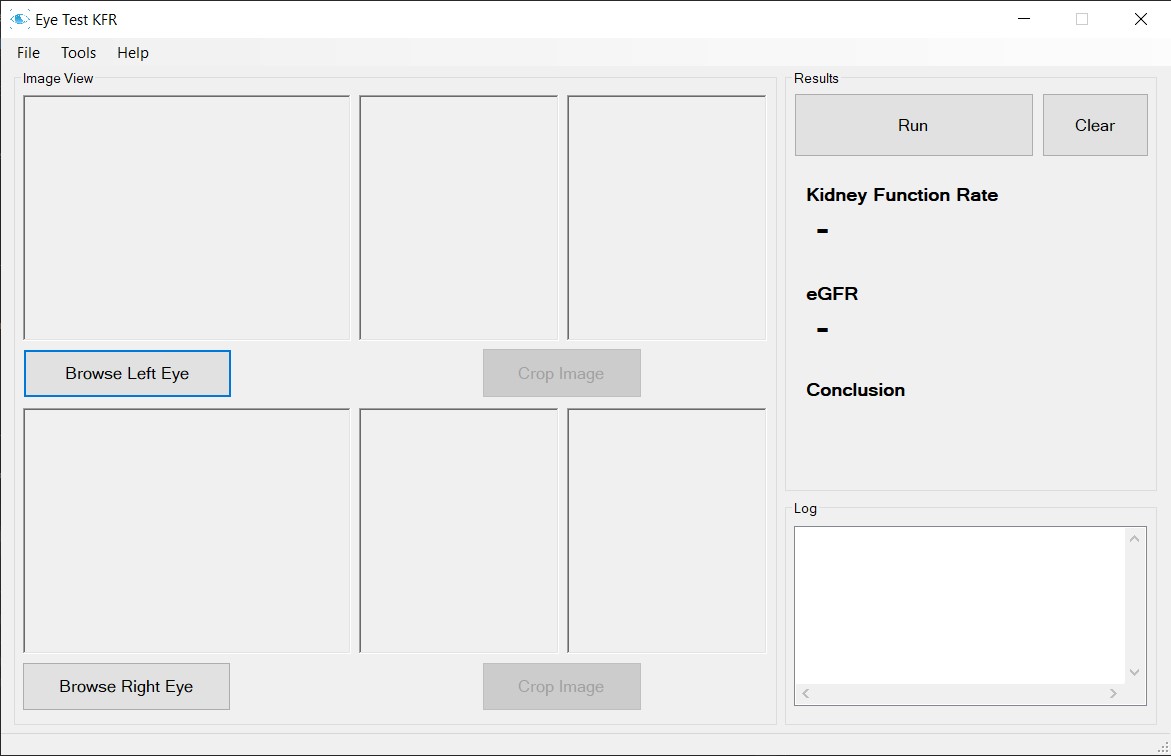
The main user interface can be seen below. (Fig. 2)
Figure 2
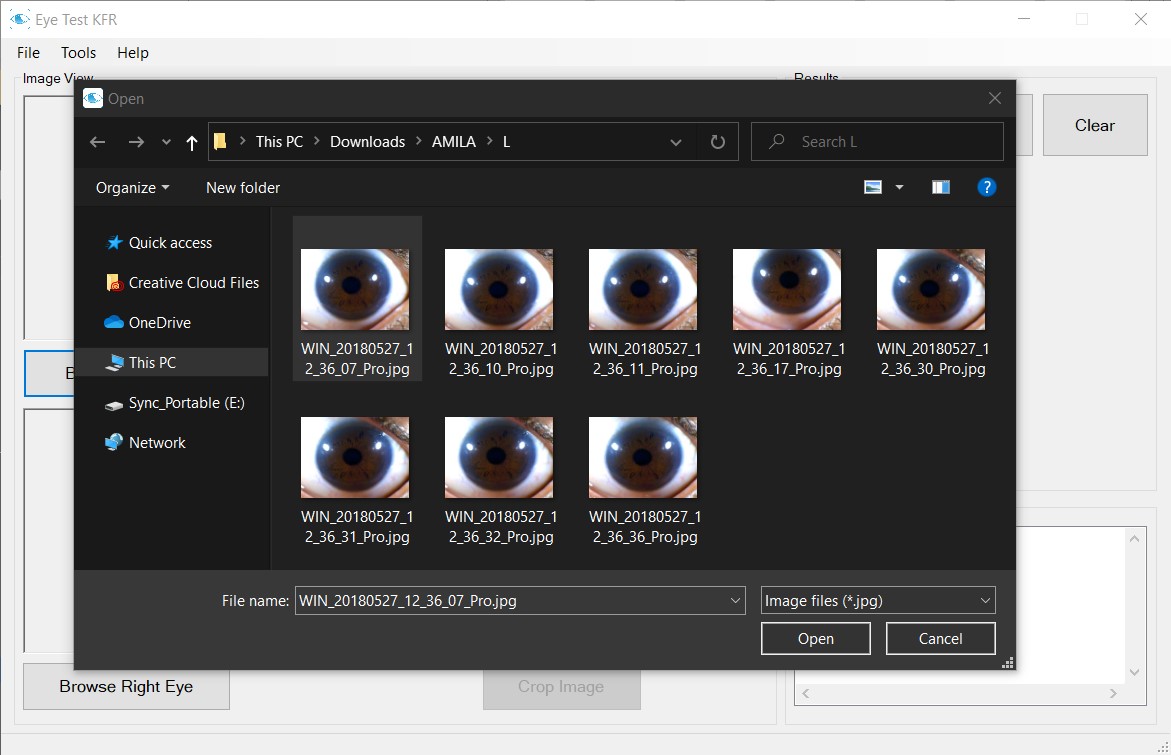
Browse for Left eye from your PC using the
"Browse Left Eye" button. AA pop-up file explorer window will be
opened. . Choose the desired Left eye image and press the open button on
the lower right side. (Fig. 3)
Figure 3
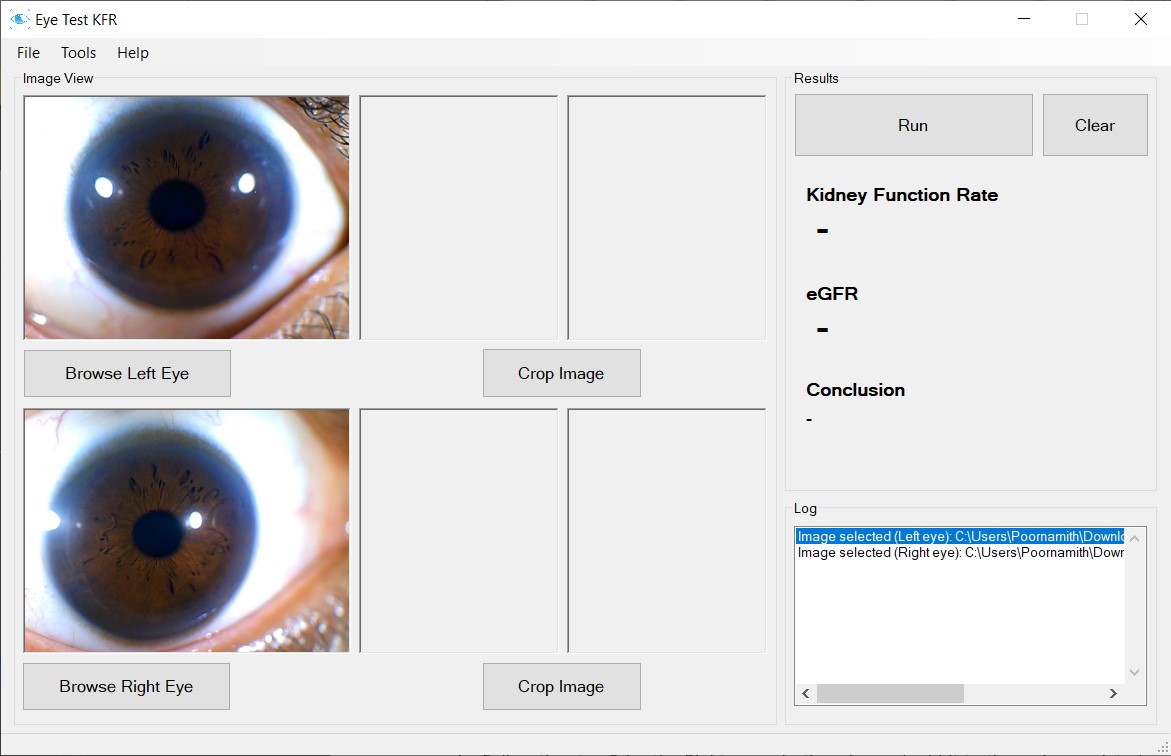
Follow the step 3 for the Right eye selection also using
"Browse Right Eye" button and add it to the main user interface.
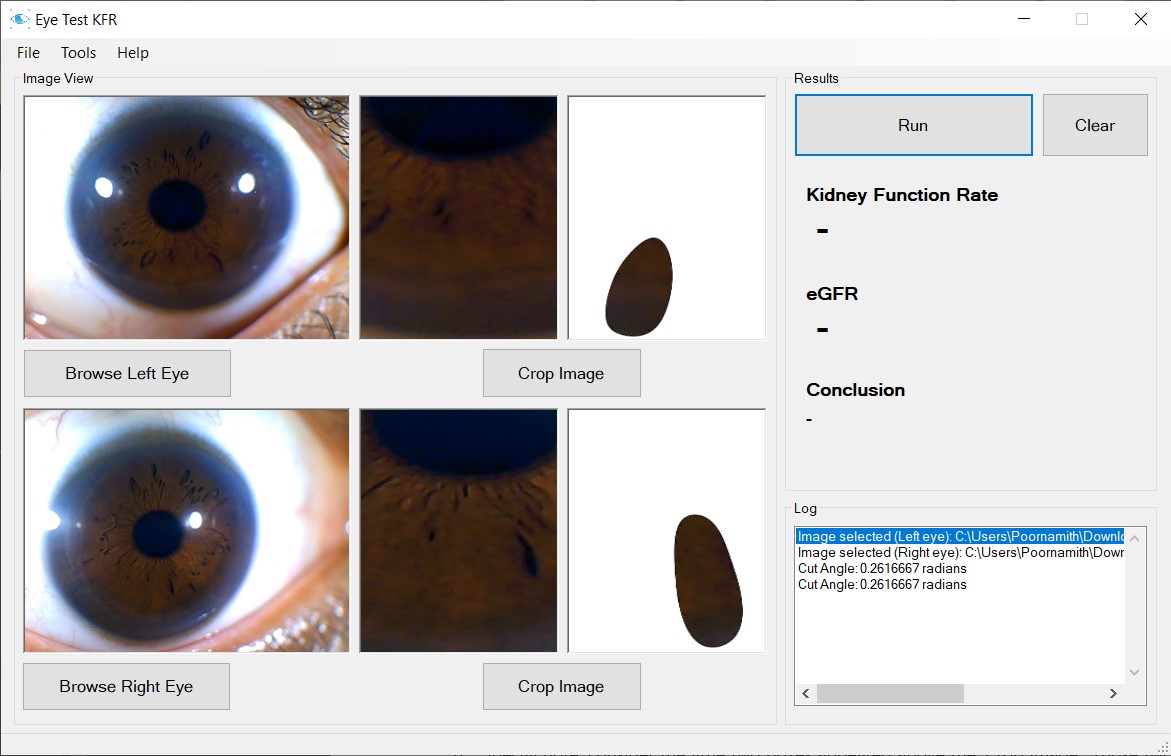
The user interface will be shown as below after adding both the images.
(Fig. 4)
Figure 4
Use "Crop Image" buttons to automatically detect the Iris and crop
the required region of interest. (Fig. 5)
Figure 5
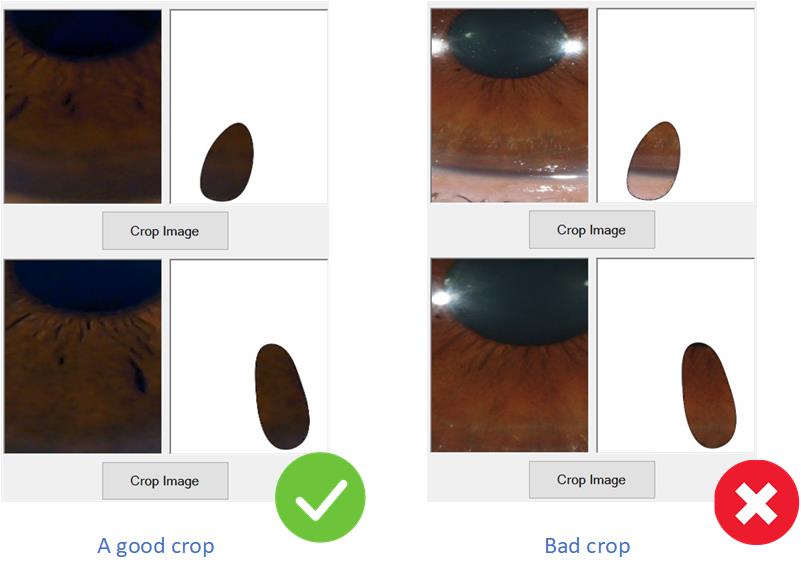
Special note: Examine the little two boxes that are above
the "Crop Image" button. (Cropped image and Region of interest) Those two
boxes should not have sclera or skin. Those two boxes ideally should be
like below. (Fig. 6 - a good crop) If somehow it contains sclera or skin,
switch to "Manual Crop Mode" from Tools. Please refer
"Manual Crop Guidelines" for more information.
Figure 6
If the image does NOT contain sclera or skin you can proceed.
Press "Run" button in order to get the results for the selected
subjects' eyes. The Results can be seen in the "Results" section, and a
complete log along with other useful information can be found in the "Log"
section. (Fig. 7) Refer "Results and Log Values Guideline" for a
detailed explanation of the log results.