Manual Crop Method
When to Enable the Manual Crop Mode
Even though our fully automatic iris detection and cropping algorithm works
fine for most professional cameras, sometimes, even on acceptable images,
skin and sclera are included in the automatically cropped area.
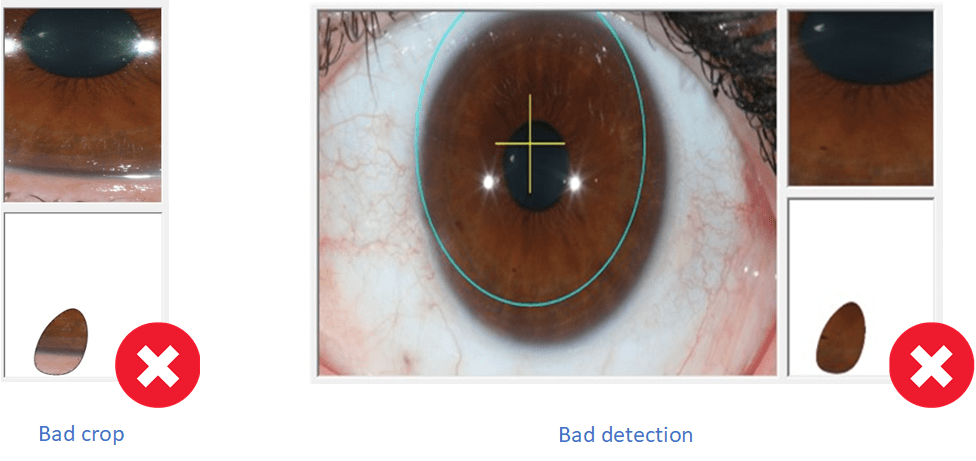 Figure 1
In the above image, (Fig. 1 - Bad crop), we can clearly see that the cropped
images contain unwanted areas that will affect the results significantly.
This can happen to a left eye crop, a right eye crop, or sometimes even in
both crops.
In the right side of the above image, (Fig. 1 - Bad detection), we can
clearly see that there is a bad iris detection. This can happen to a single
eye, or sometimes even in both eyes.
In all cases, the "Manual Crop Mode" must be enabled in order to obtain an
accurate reading. The "Manual Crop Mode" can be enabled in these
cases to take correct results.
How to Enable the Manual Crop Mode
On the top menubar, click on the "tools" button, then choose "manual crop
mode" button from the dropdown. (Fig. 2)
Tools ➔ Manual Crop Mode
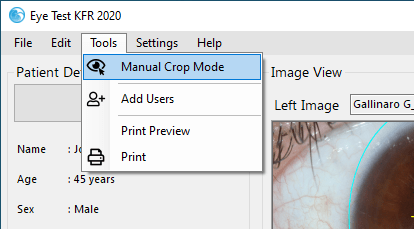 Figure 2
The manual crop mode can be seen in the figure below. (Fig. 3) Even if only
one of the images had sclera and skin you will need to reinsert BOTH images
in the below screen. You will notice that the manual crop mode resembles the
automatic crop mode. As you proceed you will recognize that the manual crop
mode has, indeed, been activated. Don't be confused, just keep on going. 😊)
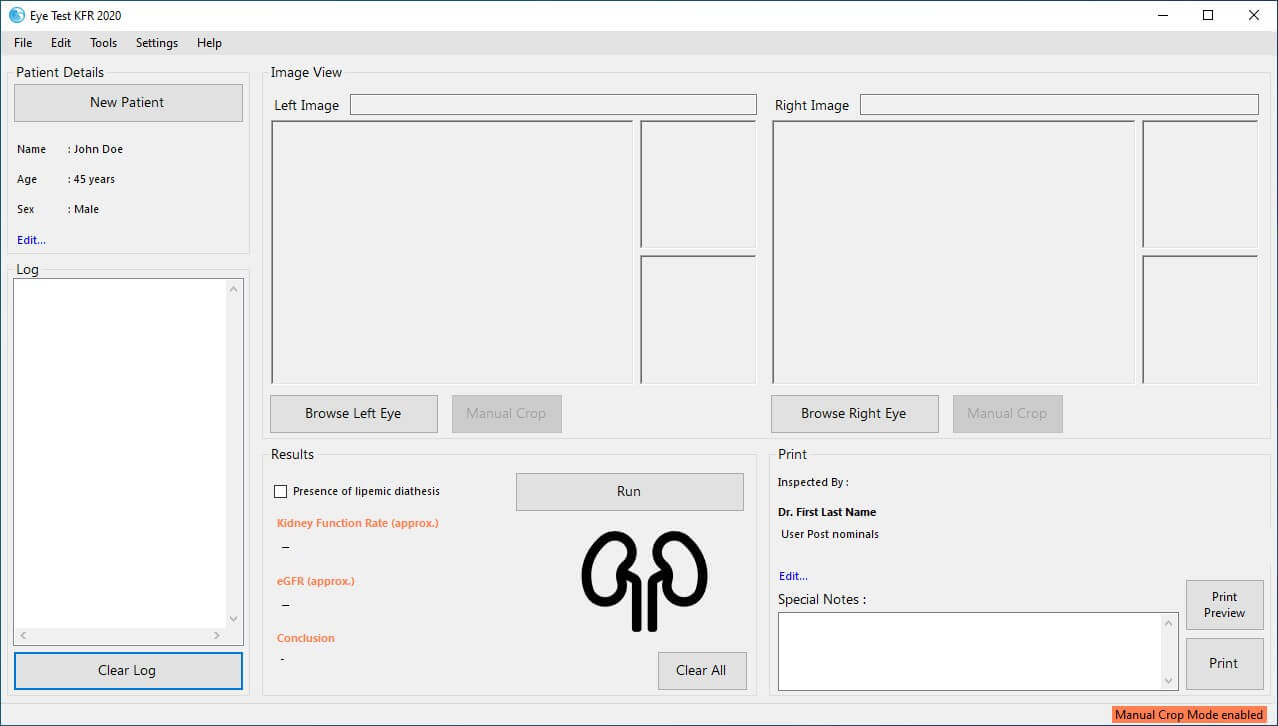 Figure 3
Steps to follow
-
Insert the images accordingly that were unable to crop properly. (Fig. 4)
 Figure 4
-
Move the mouse to the pupil center and left click. A crosshair will
appear on the image in Yellow with a green dot indicating the center of
the pupil. (Fig. 5)
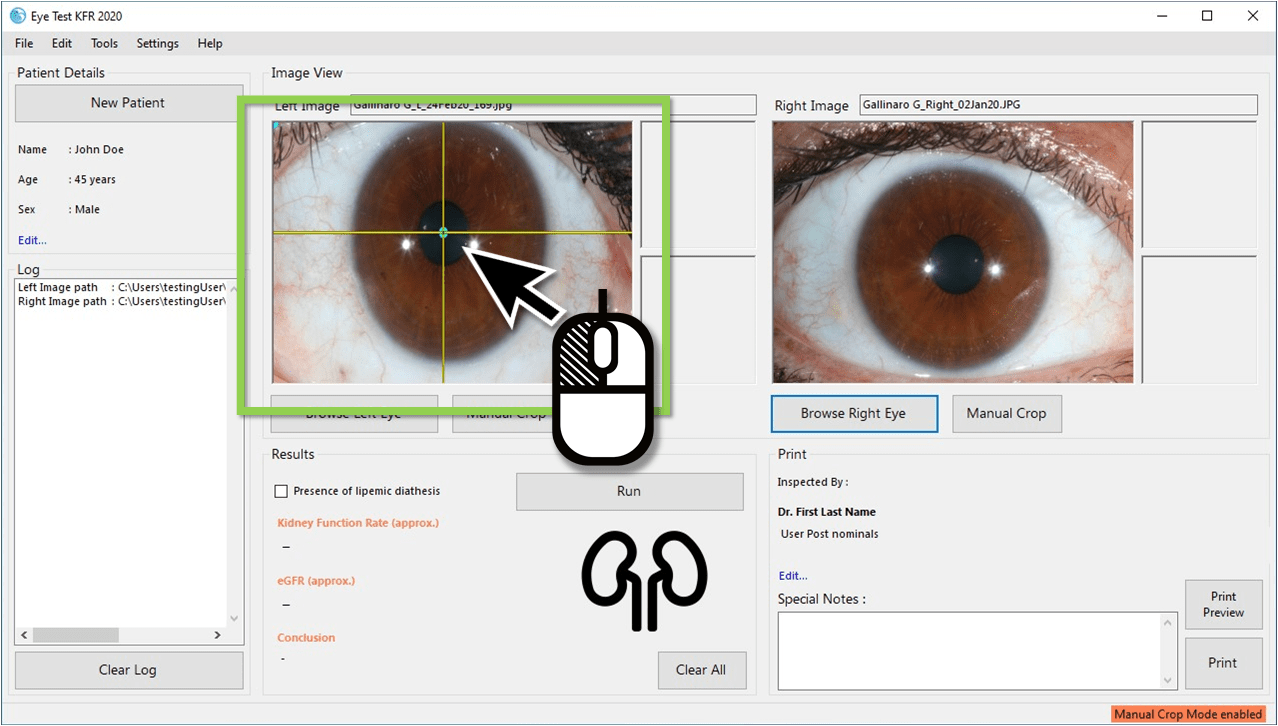 Figure 5
Special Note: Since this mode is completely manual,
please try to determine the pupil center as best as you can. If you are
not satisfied with your selection, you can retry by pressing the "Left
mouse button" once again in the pupil center. Repeat this step until you
are satisfied with the selected pupil center
-
Then select the Iris border using the "Right mouse button" click on
the selected image. (Fig. 6) A circle will appear indicating the perimeter
of the iris
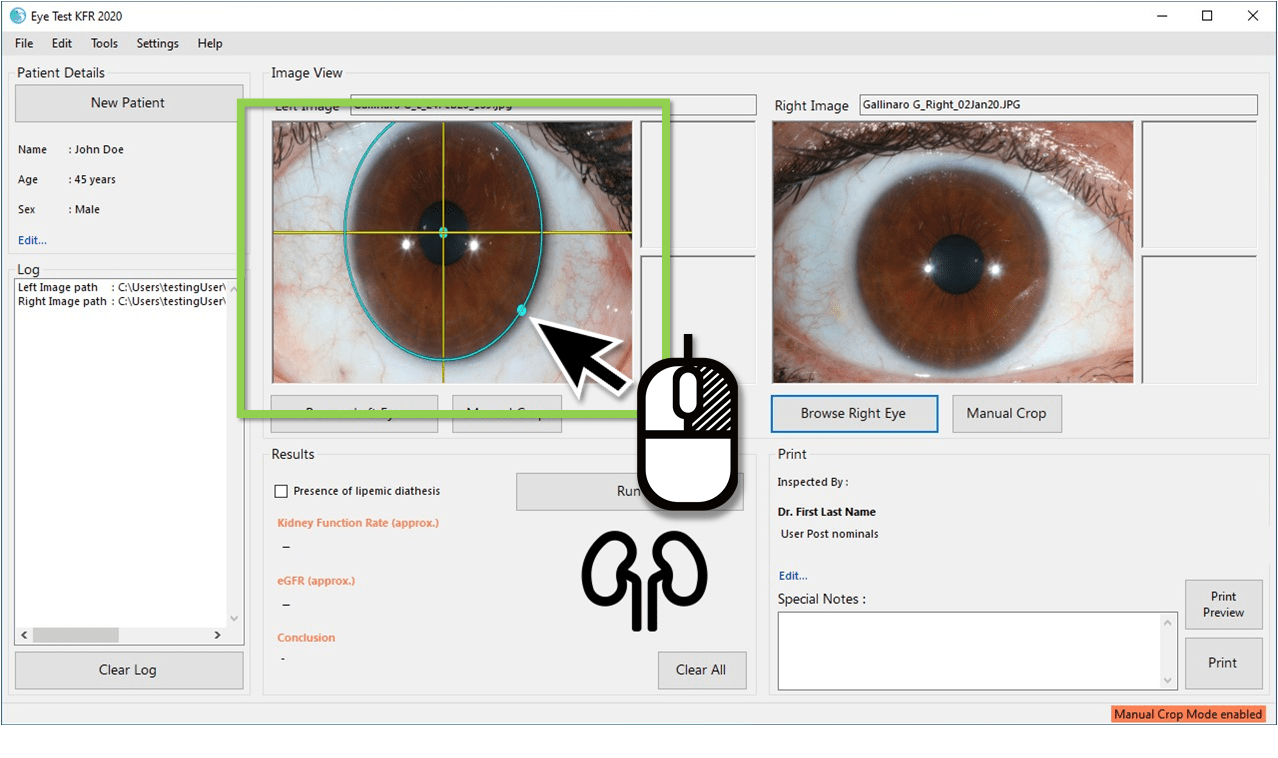 Figure 6
Special Note: Since this mode is completely manual, please try to
get the best iris border as much as possible. A
good iris border should NOT contain any part of the sclera,
especially on the bottom part of the iris borderline depicted in
purple color. If you are not satisfied with your selection, you can retry
by pressing the "Right mouse button" once again in the iris border. Repeat
this step until you are satisfied with the selected iris border.
Always pay attention to the bottom part of the iris borderline to ensure
that this is close to the periphery of the iris. There will usually be a
small gap between the top of the iris periphery and the iris. This is
acceptable.
-
Repeat the same procedure for the right eye also, where use Left mouse
button to select pupil center and Right mouse button to select iris
border. A good manual selection can be seen in the following figure. (Fig.
7) Note that the iris borderline does not include any sclera in the bottom
half.
 Figure 7
-
Crop the eyes using the "Manual Crop" buttons. Note that you can always
review the crop and the region of interest and re-do the
pupil center selection and iris border selection if you are
not satisfied with the crop or region of interest.
-
A good manual crop can be found in the following figure. (Fig. 8) You can
re-do the steps 2-5 as much as you like until you are satisfied with the
crop results.
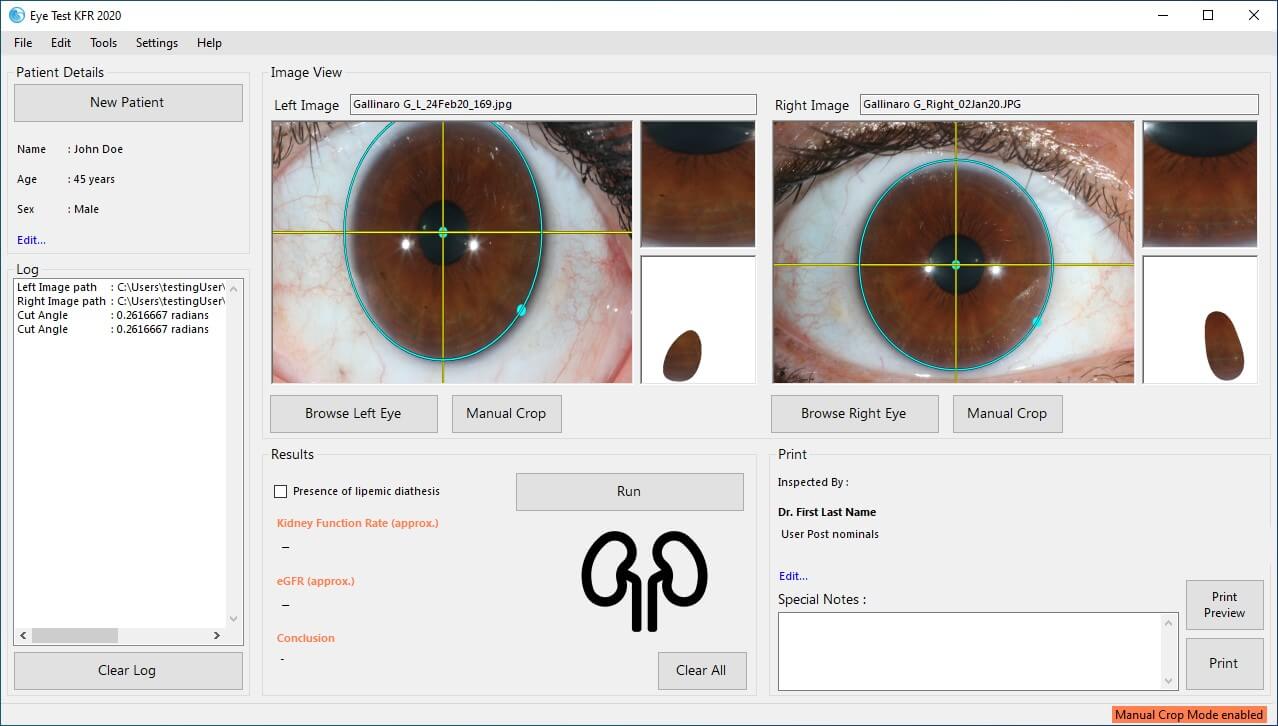 Figure 8
-
Press "Run" button for the results and the log details will be added to
the "Log" accordingly. (Fig. 9)
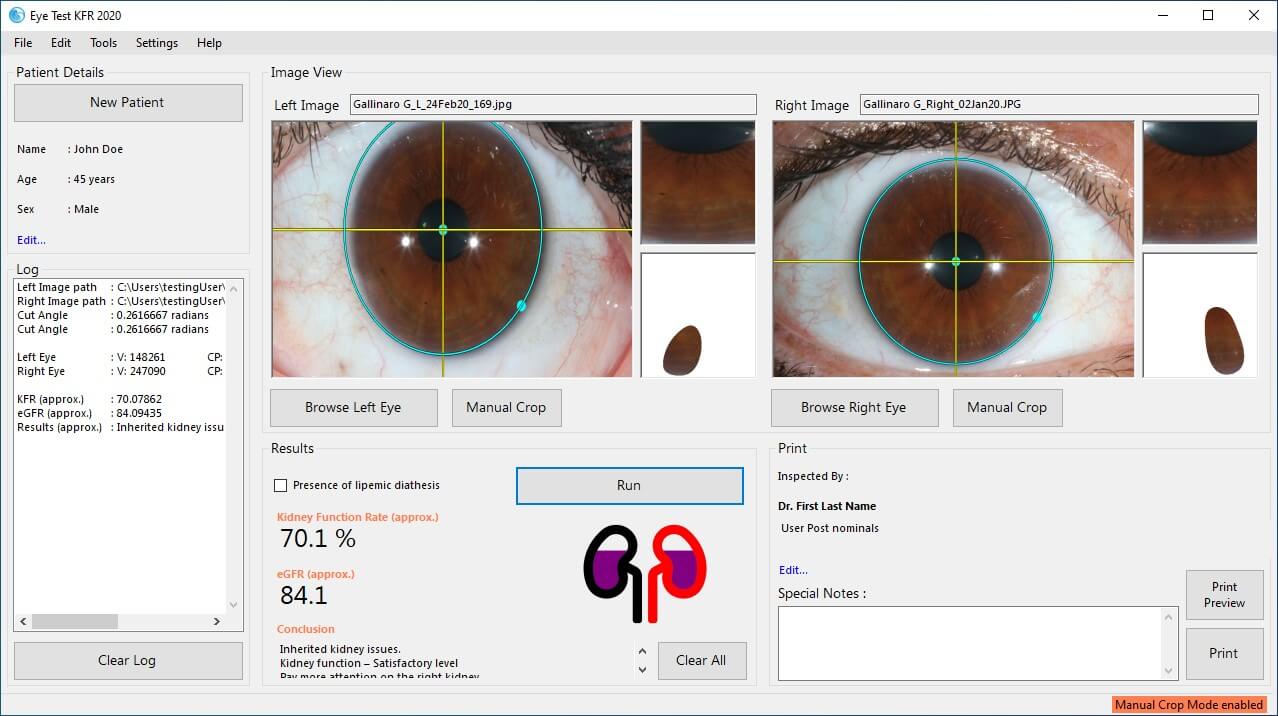 Figure 9
Important Note: It is extremely important to carefully
follow all steps in detail in order to obtain accurate results.